Now Reading: Upcycling containers into gadgets
- 01
Upcycling containers into gadgets

Transforming Doublemint, Centerfresh, and Coke cans into music players
What if your favorite everyday container could be transformed into a music player? This project is all about upcycling everyday containers into creative gadgets, like turning Doublemint, Centerfresh, and Coke cans into functional DIY music players. Whether you’re a music enthusiast or a DIY lover, this project will inspire you to turn trash into a sustainable music player that is both creative and functional. Join me as I explore innovative upcycling ideas and dive into the world of recycled electronics projects.
1. Doublemint dispenser into Jukebox

The key hardware components of this project include
- Other components like a headphone jack and a tact switch.
I repurposed the headphone jack and tactile switch from an old, non-functional MP3 player module. Additionally, I customized both the control and power boards using a perfboard to perfectly match the design and functionality.
Control and power board design
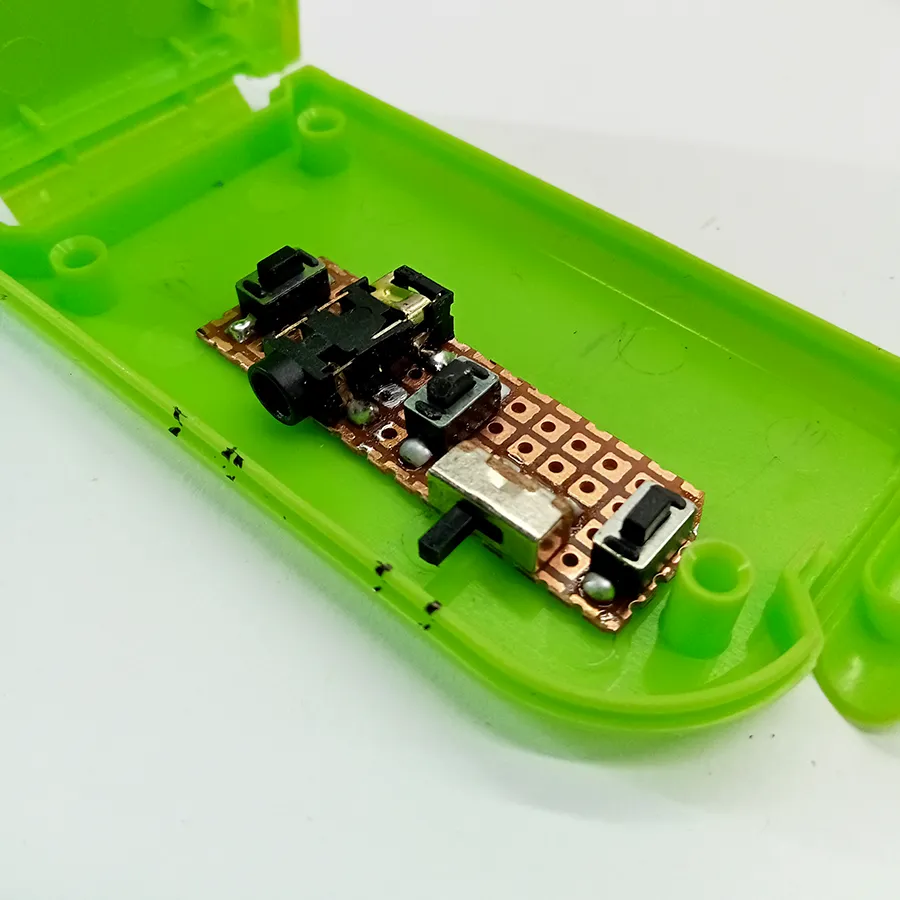

To begin, I positioned the MP3 player module in an optimal place inside the container, ensuring a comfortable fit. Next, I cut a perfboard to create small control and power boards, making sure they fit freely within the available space. On the control boards, I soldered three tactile switches for Play/Pause and Volume Up/Down, as well as a power on/off switch and a headphones jack. The power board features a USB-C power socket and a pair of resistors to convert mono audio to stereo. After assembling these boards, I carefully created slots on the side of the container to accommodate the switches and headphones jack.
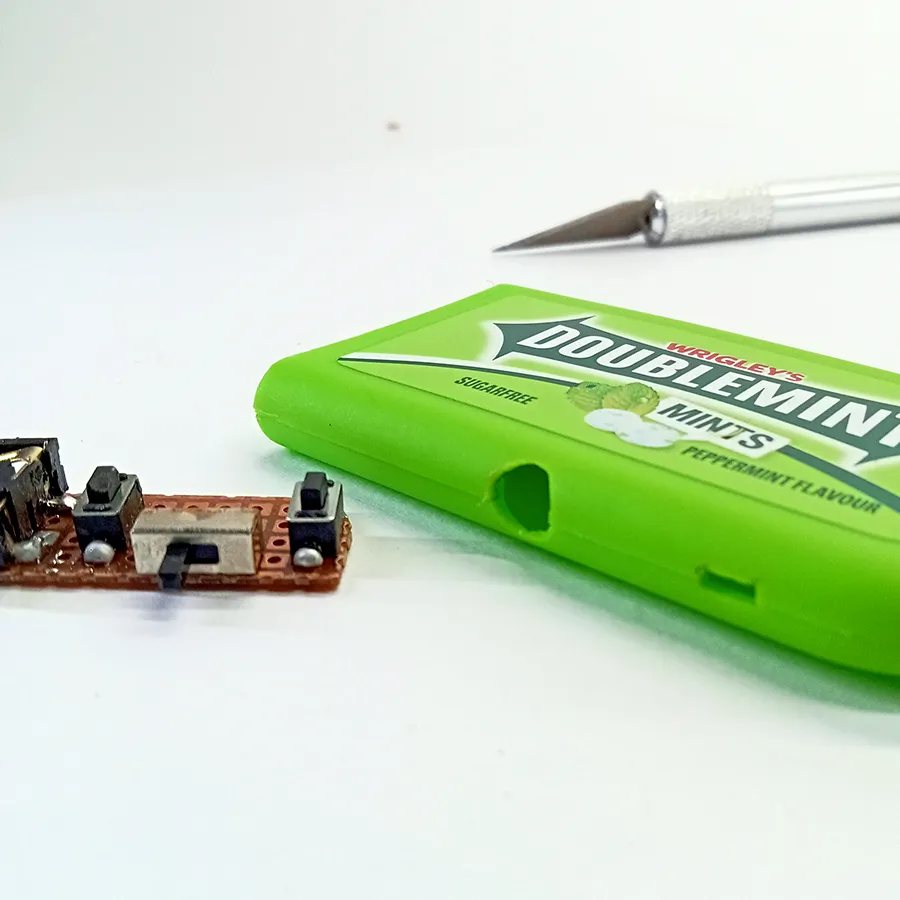

Assembly and Wiring Process of MP3 player

Once the module and boards were securely placed inside the dispenser, I connected them using wires. To create the slots for the headphone jack, switch, and USB-C socket in the container, I used a medium-hot soldering iron to make the initial holes, then fine-tuned the openings with a surgical blade to fit each component precisely.

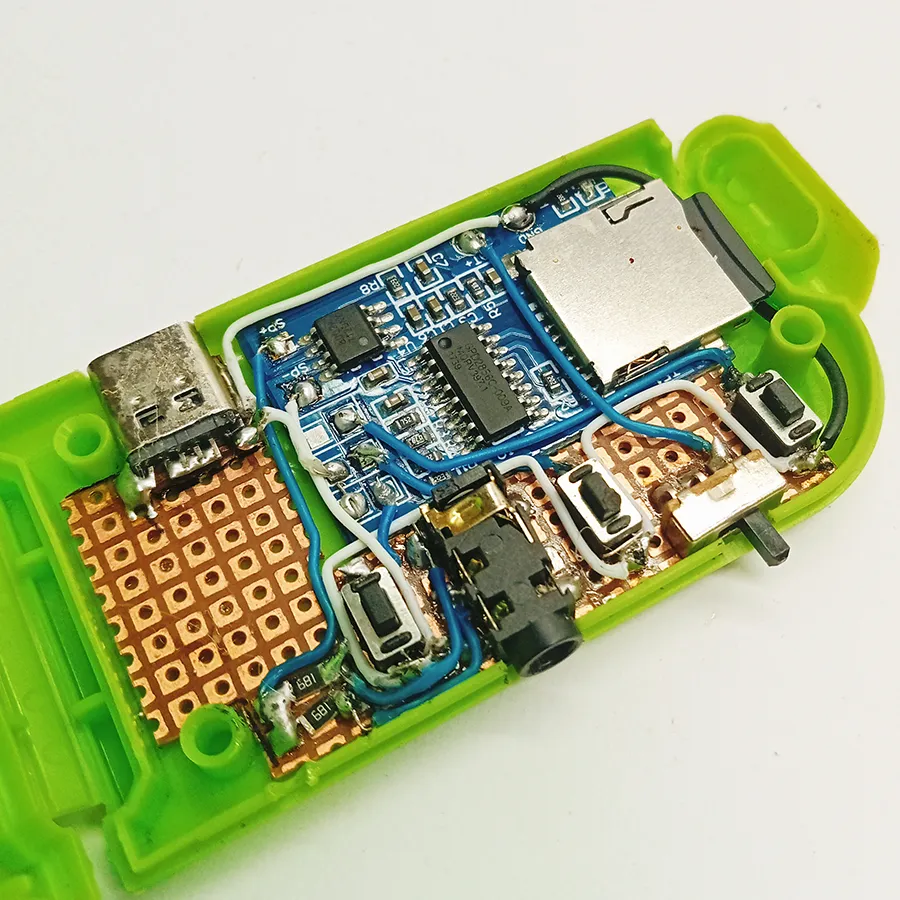
Once the first stage of assembly was completed (control and MP3 player module), I added the battery and charging module. Before mounting the charging module, I placed a plastic cut piece underneath to prevent any short circuits. All components were securely positioned and glued, ensuring there were no gaps or movement. After assembling everything, I tested the setup, and it worked perfectly. Since the audio output was 2W mono, I used 680Ω resistors to split the output and create a stereo signal.

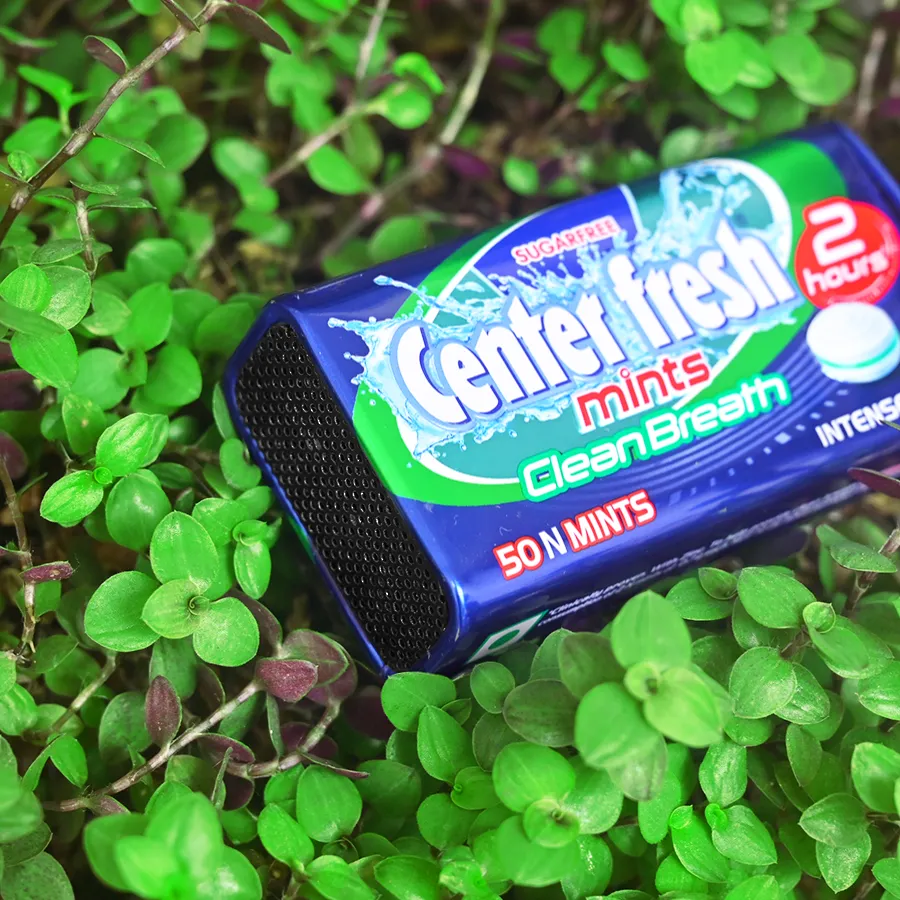
2. CenterFresh Dispenser Radio
I’ve always liked creative packaging and unique containers. My colleagues bring different kinds of mint containers. When I see an interesting one, I ask them to keep it for my collection instead of throwing it away. Here, I am upcycling some of these containers into a radio.

At first, I made the radio housing using a PVC pipe. I heated the pipe to soften it, then flattened it into shape. PVC is great for DIY projects because it is easy to cut, bend, drill, and shape, making it perfect for hobbyists.
Components
The key component hardware of this project includes
- 2W laptop Speaker

I reused a 2W speaker that is commonly used in laptops and micro push buttons from an Arduino Nano. For charging, I soldered a USB-C port and a small slide switch onto a piece of perfboard. This board switches between play mode and charge mode.
Assembling


The whole assembly has mainly two layers. The base layer holds the battery, charging module, charging port, switch, speaker, and amplifier module. The top layer contains the FM board, and the control buttons sit on the side of the casing.
When I tested the radio, it wasn’t receiving any stations properly and seemed to require a proper antenna. While scanning through certain frequency ranges, it felt like it was picking up some signals, but they were unclear. So, I attached a copper wire to the outer casing and connected it to the internal antenna wire. After doing this, I was able to receive some stations in the higher frequency range, but the reception was still not clear.
Note: To avoid scratches while drilling holes in the container, I cover the surface with two layers of masking tape. Then, mark the spot and drill carefully. Also, place a solid object behind the drilling surface to make cleaner holes and prevent dents.
3. Coke Can Bluetooth Speaker
Normally, we throw away beverage aluminum cans after enjoying our favorite soft drinks. However, I’ve always been more fascinated by the sleek and compact design of Coke cans than the drink inside. So, instead of simply discarding them, I decided to upcycle one into a stylish and functional Bluetooth speaker. As a result, what was once waste is now a creative and practical gadget. In this project, I transformed a 300-ml aluminum can into a unique, portable audio device, combining creativity with sustainability.

The challenge was to build this gadget without altering the outer surface of the can. Any modification to the exterior would compromise its sleek and stylish look. The only viable option was to remove the sealed lid completely and insert the MP3 module and other necessary electronics parts. So, I carefully removed the lid using a nipper. Note: Take precautions while removing the lid with a nipper, as the edges can be very sharp and may easily cut the skin. Also, perform this step in a safe and controlled area, as tiny metal pieces, or fragments, may be created during cutting. These small shards are difficult to see and can be hazardous.

Tube-mount structure
The available space inside the can is approximately 110–120mm in height and 45mm in diameter. I decided to go with a tube-mount structure to hold the speakers, Bluetooth module, battery, and other components. To create this setup, I used a 40mm (1.5-inch) PVC pipe. You can easily insert this structure into the can, and it fits perfectly inside.


I began building the speaker mount. Since the available height inside the can is 120mm, I divided it into four sections: two for speakers, one for mounting the module and battery, and one for the top panel. The speaker mount itself is 25mm high, perfectly fitting a ½-inch 2W speaker. To secure the speaker in place, I used internal spacers, which I made from a 2-inch-diameter PVC pipe piece. Its outer diameter perfectly fits inside the 1.5-inch pipe’s inner diameter. This setup ensures a snug and stable fit for optimal sound output.

Making control panel
To make the control panel, I vertically cut a PVC pipe in half and heated it to flatten it into a usable sheet. The control panel is 10mm high and includes a USB-C socket and a switch soldered onto a perfboard. The plus-shaped top panel acts as both a lock and a holder, fitting snugly into the can’s opening. Since this speaker system has only one sound vent at the top, I left as much open space as possible in the top panel to allow clear sound output from both speakers.

I completed the tube-mount structure by attaching two speakers and the control panel using two vertically cut PVC pieces to form a tubular-shaped frame. Now, the only remaining space available is for the module and battery holder between the speakers.
Making holder for module and battery

Then, I made a mount for the Bluetooth module and battery with semi-arc brackets at the ends, designed to be twisted and inserted into the tubular structure. This mounting method works similarly to a press-fit system, like inserting a bearing into a flange.
Fabricating a grille for the top panel


This is the fully assembled tube-mount structure, which contains the battery, Bluetooth module, speakers, and control panel. I inserted this structure into the can and secured it with glue at both the top and bottom.
The sound quality of this Coke can speaker is average, but its unique design makes it visually appealing and intriguing. While it may not deliver high-end audio performance, its compact and creative form factor adds to its charm, making it a great DIY conversation piece. I hope you enjoyed this upcycling everyday containers into creative gadgets project.

Disclaimer: This project involves the repurposing of product containers, including those from Doublemint, Center Fresh, and Coca-Cola. The use of these branded items is solely for creative and upcycling purposes. The respective brands or companies do not affiliate with, endorse, or sponsor this project. All trademarks, logos, and brand names are the property of their respective owners.
Stay Informed With the Latest & Most Important News
Previous Post
Next Post
Previous Post

BLOG10 months ago
Consistent AI watercolor portraits
Next Post

BLOG9 months ago
Build a website using AI
Recent Comments

Hi, I’m Krishna Kumar (CrishCreative), a seasoned graphic designer with a professional background in branding and advertising. My passion lies in blending art and science to craft innovative ideas and strategies that leave a lasting impact. I am currently working as a creative director.Beyond work, I immerse myself in art, crafting, photography, and hands-on projects—whether it’s tinkering with electronics, exploring mechanical builds, or diving into creative crafts. Driven by curiosity, I’m always learning, discovering, and finding inspiration in the unexpected. For me, every challenge is an opportunity to grow, spark fresh ideas, and create something meaningful.

BLOG10 months ago
Consistent AI watercolor portraits
BLOG9 months ago
Build a website using AI
PROJECTS9 months ago
Upcycling containers into gadgets


BLOG9 months ago
Build a website using AI
PROJECTS9 months ago
Upcycling containers into gadgets
BLOG10 months ago
Consistent AI watercolor portraits

- 01
- 02
PROJECTS9 months ago
Upcycling containers into gadgets
- 01
BLOG9 months ago
Build a website using AI
- 02
PROJECTS9 months ago
Upcycling containers into gadgets
Stay Informed With the Latest Post


BLOG10 months ago
Consistent AI watercolor portraits
BLOG9 months ago
Build a website using AI
PROJECTS9 months ago
Upcycling containers into gadgets