Now Reading: Consistent AI watercolor portraits
- 01
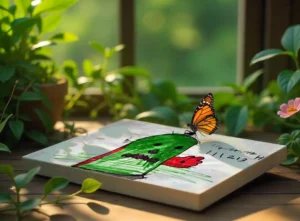
Consistent AI watercolor portraits
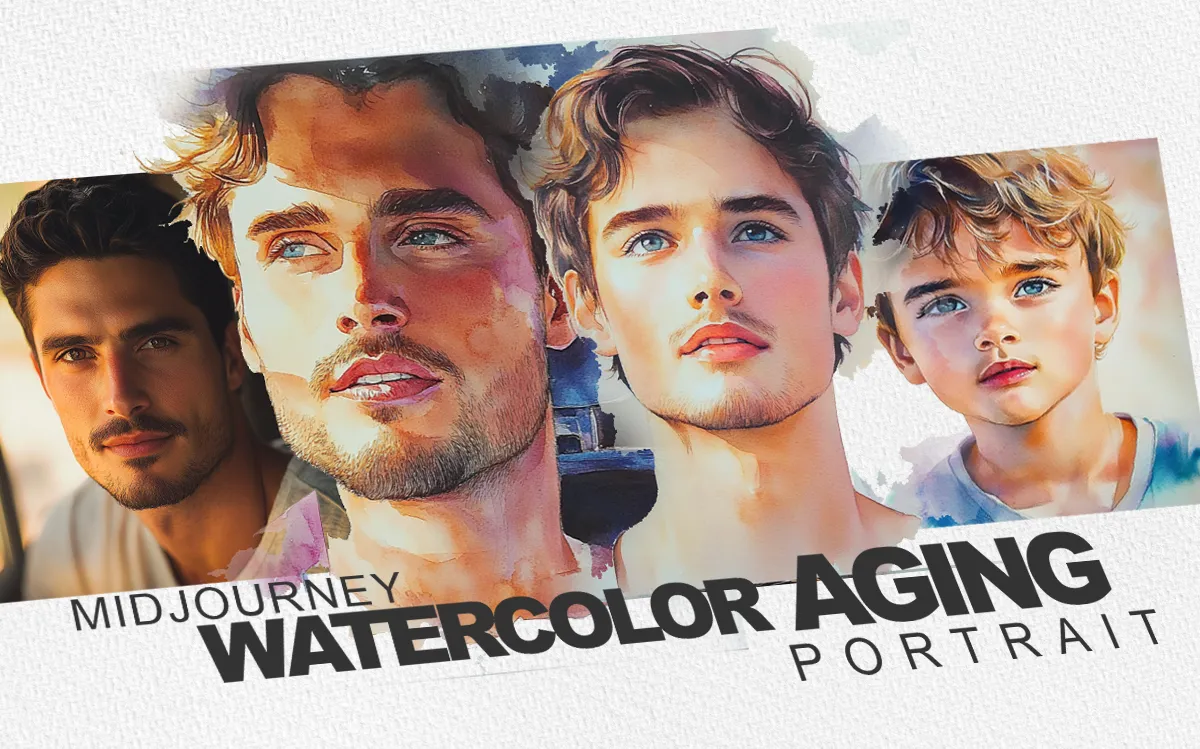
A step-by-step guide to generating watercolor aging portraits using Midjourney AI.
In this blog post, I’m sharing a detailed, step-by-step process for creating a consistent AI watercolor portraits of a character at different ages using MidJourney, one of my favorite AI image generation tools. These days, there are many AI platforms available; however, I personally prefer MidJourney due to its fine-tuned control, creative flexibility, and powerful features. Moreover, although it might seem complex at first, it quickly becomes a surprisingly user-friendly tool once you get the hang of it. As a result, it’s an excellent choice for both artists and creators exploring AI-generated art. Recently, I was assigned a watercolor-based project and took the opportunity to experiment with various techniques in MidJourney. In this post, I’ll walk you through the methods I used to achieve a beautiful aged watercolor portrait effect — all generated with AI.
I chose Stealth Mode because I want to create in private. In the Basic and Standard Plans, all creations are publicly viewable, which may not be ideal for client work or personal projects.
Getting started to Midjourney
Step 1: Sign Up for MidJourney
- Go to the official Midjourney website.
- Click on the “Sign Up” button.
- Choose “Continue with Discord” when prompted.
- Fill in your Display Name.
- Complete the required verification steps.
- Enter your Date of Birth and Email ID.
- After verification, your Discord dashboard will open.
Step 2: Create Your Own Discord Server
- On the top left corner of the Discord dashboard, click the “+” symbol to add a new server.
- Under the options, select “Create My Own”.
- When asked, choose “For me and my friends”.
- Enter your desired Server Name.
- (Optional) Upload a Profile Picture for your server.
- Click Create — your new Discord server is now ready to use with MidJourney! A server icon will appear in the top left corner of Discord, displaying the first two letters of your server name by default. Open that server and start generating images.
Enabling ‘stealth mode’
Because I prefer to create in private, I chose the Stealth Mode available under the paid version of MidJourney. This allows me to generate images without them being publicly visible.
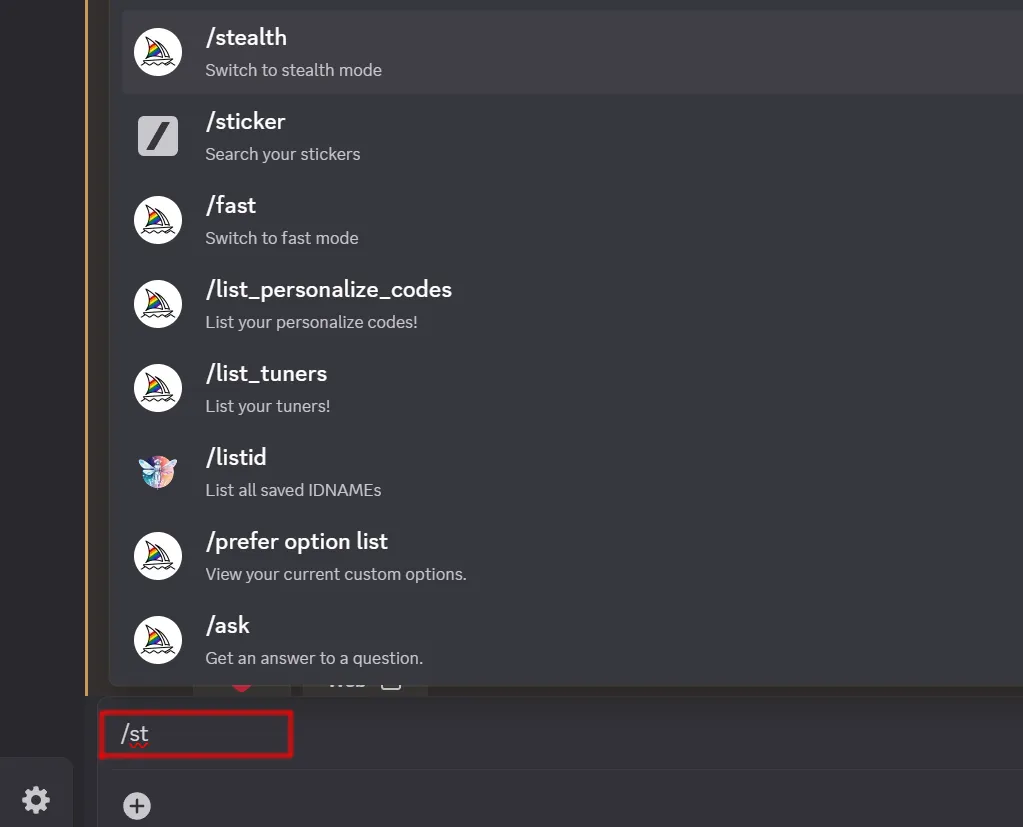
Just type /stealth in the command bar and press Enter—that’s it! Your stealth mode is now activated, and all your generated images will be private.
Generating images from prompts
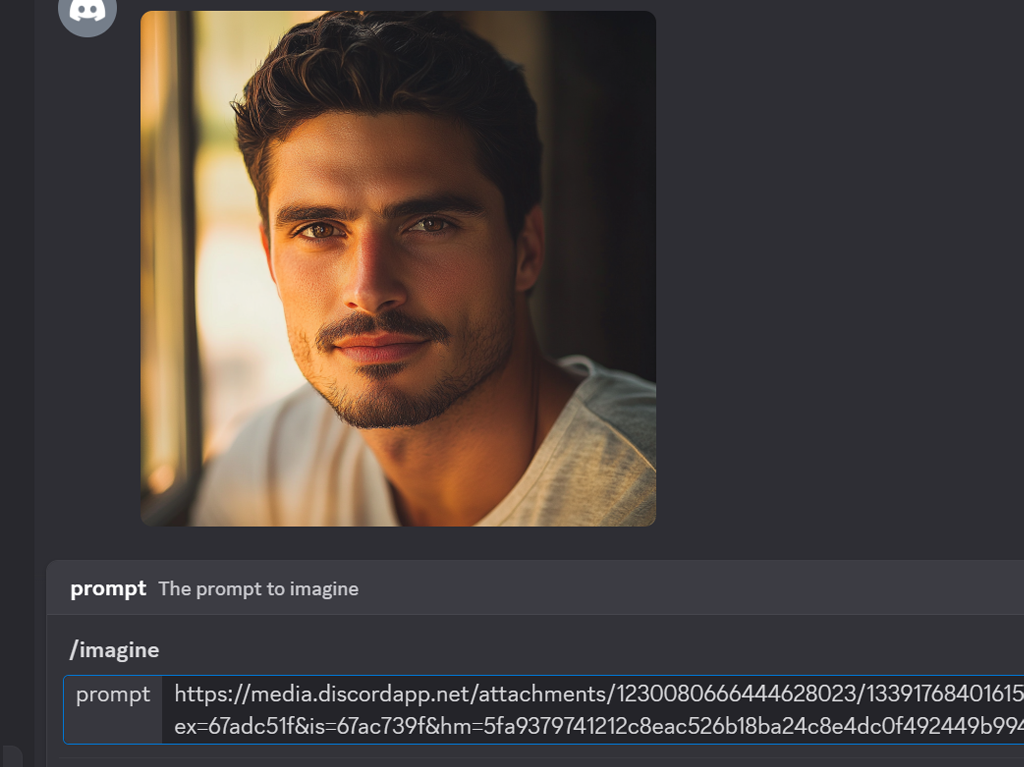
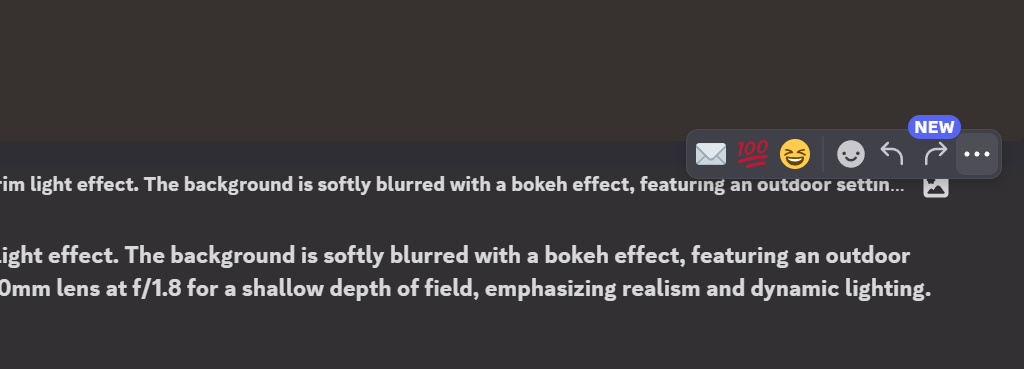
To create an image in MidJourney, type /imagine in the command bar, followed by your prompt. In my case, I used the help of ChatGPT to generate a detailed prompt. I asked it to create a random image prompt by requesting
“Write a prompt for creating a cinematic-style male portrait in Midjourney.”
Prompt result :
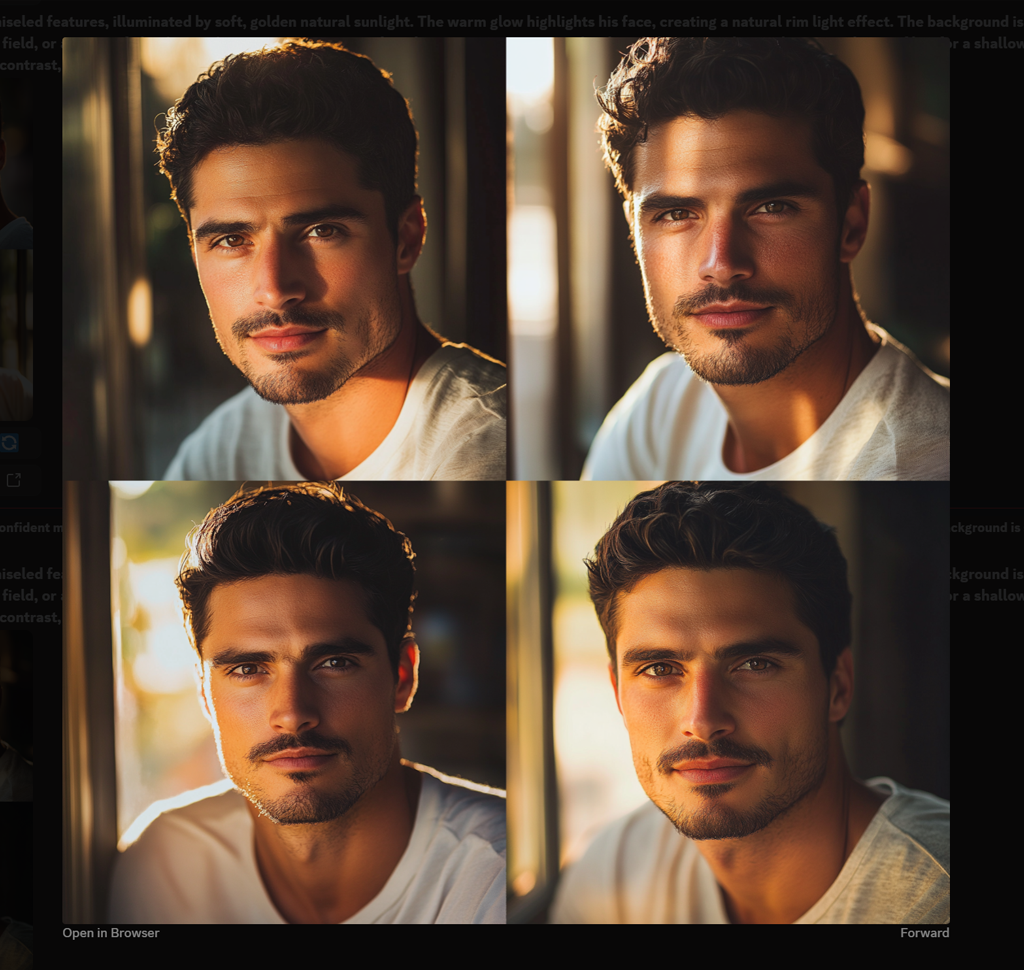
“cinematic portrait of a confident man with chiseled features, illuminated by soft, golden natural sunlight. The warm glow highlights his face, creating a natural rim light effect. The background is softly blurred with a bokeh effect, featuring an outdoor setting—perhaps a sunlit city street, an open field, or a cozy café by the window. His expression is relaxed yet intense, capturing depth and character. Shot with a 50mm lens at f/1.8 for a shallow depth of field, emphasizing realism and dynamic lighting. The image has a filmic quality with balanced contrast, warm skin tones, and a professional-grade”

The above are the result I received: By default, MidJourney generates four image variations based on your prompt. After that, you can choose to upscale any of them using the U1, U2, U3, and U4 buttons. If you’d like, you can generate more variations of a specific image using the V1, V2, V3, and V4 buttons. Finally, if you’re not satisfied with the any of the four results, simply hit the refresh ‘↻’ button to generate a new set of four images.
I chose V4 to generate a new set of four image variations.
I am ok with the fourth image and chose to create consistent watercolor portrait, When you choose and click on any of the four images U1,U2, U3, U4, it is automatically upscaled to a resolution of 1024 × 1024 pixels.
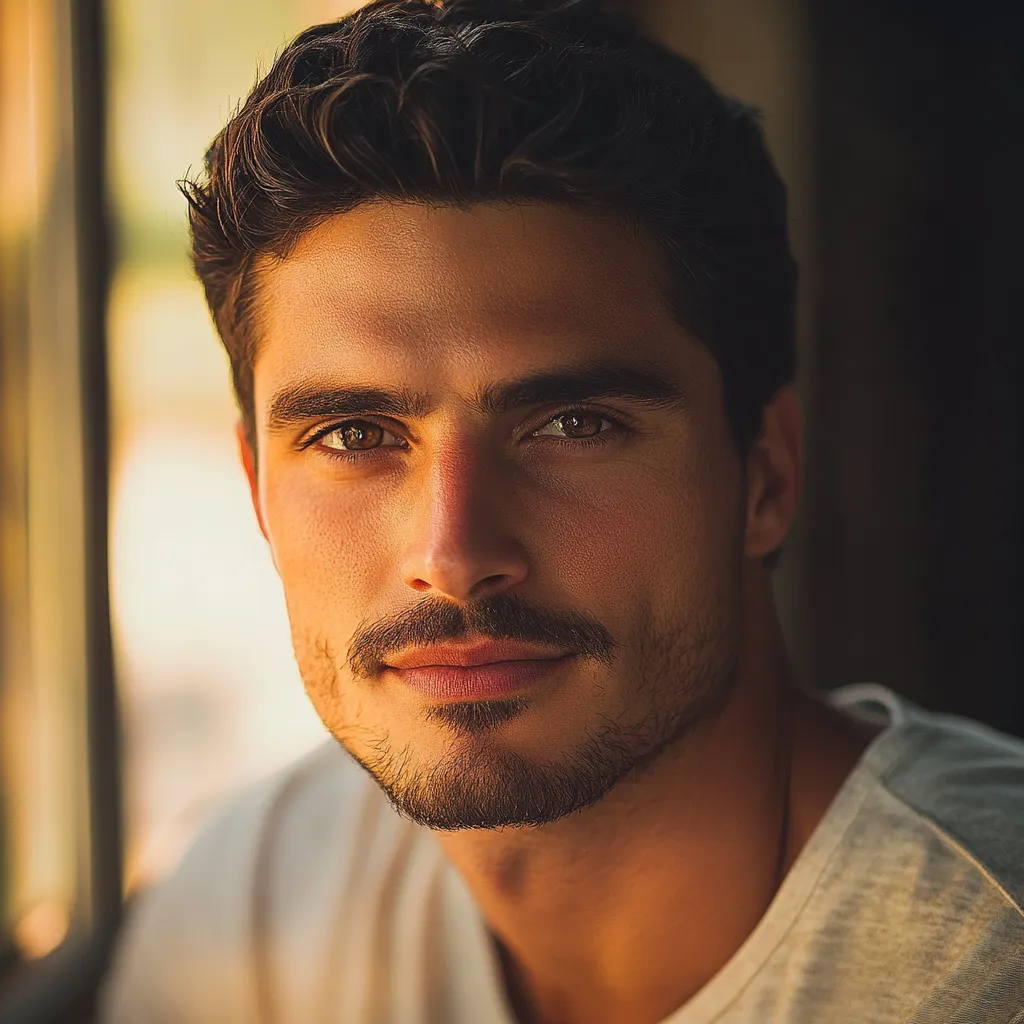
This is the upscaled version of the selected image, which I’ve saved to my computer for further purpose. Additionally, We can further upscale it using options like Upscale (Subtle), Upscale (Creative), Vary (Subtle), Zoom Out 2x, Zoom Out 1.5x, or Custom Zoom.
Let’s generating watercolour art effect
Creating watercolor-style artwork with MidJourney is both exciting and surprisingly intuitive. With the right prompt structure, you can achieve beautiful, soft, hand-painted effects that mimic traditional watercolor techniques. I attempted few alternative methods as experiment to generate a watercolor effect. I’m going to demonstrate a simpler method here using the reference image upload option.
Uploading an image
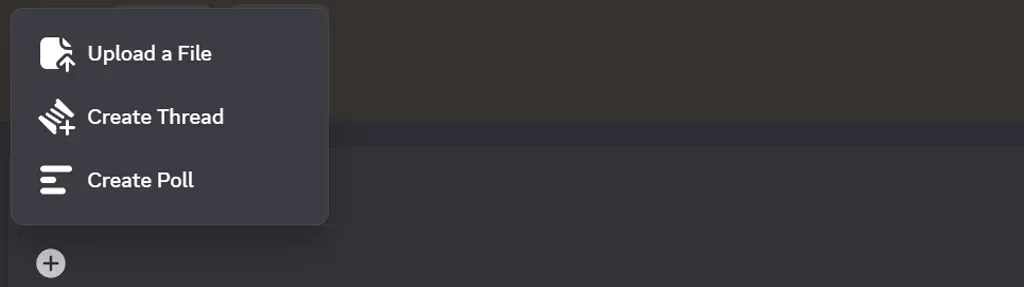
To begin, to upload an image from your local computer to MidJourney, click on the plus symbol (⊕), located near prompt field, then select ‘Upload a File‘ from the pop-up menu. Choose your image, click to upload, and press Enter.
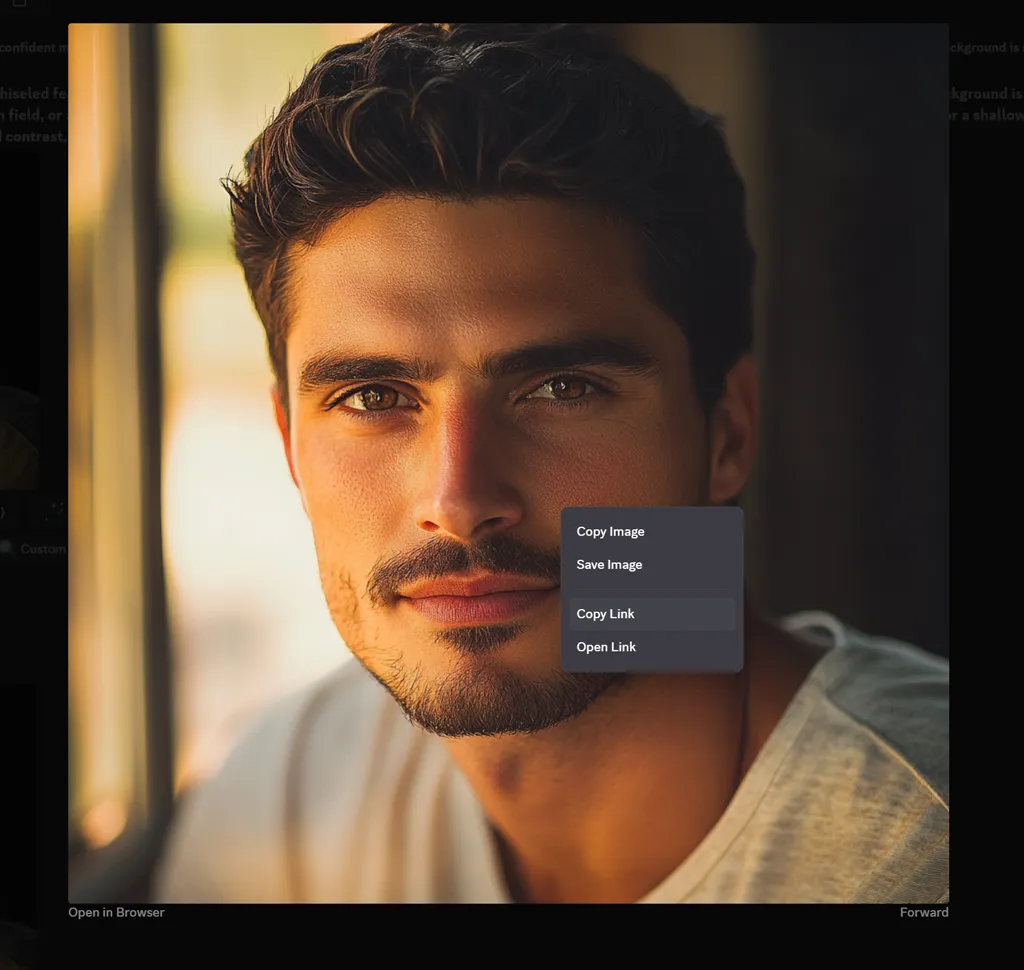
The uploaded image will be displayed in MidJourney shown below. Then, right-click on the image and select “Copy Link”.
Using this link, we are converting the image into watercolor-style art. Since I’m not very familiar with watercolor terms or art-specific styles, I needed to figure out which style would best suit my requirements. To help with that, I used the /describe feature in MidJourney. This tool analyzes the uploaded any image and generates four prompt suggestions that you can use to recreate the image in different styles.
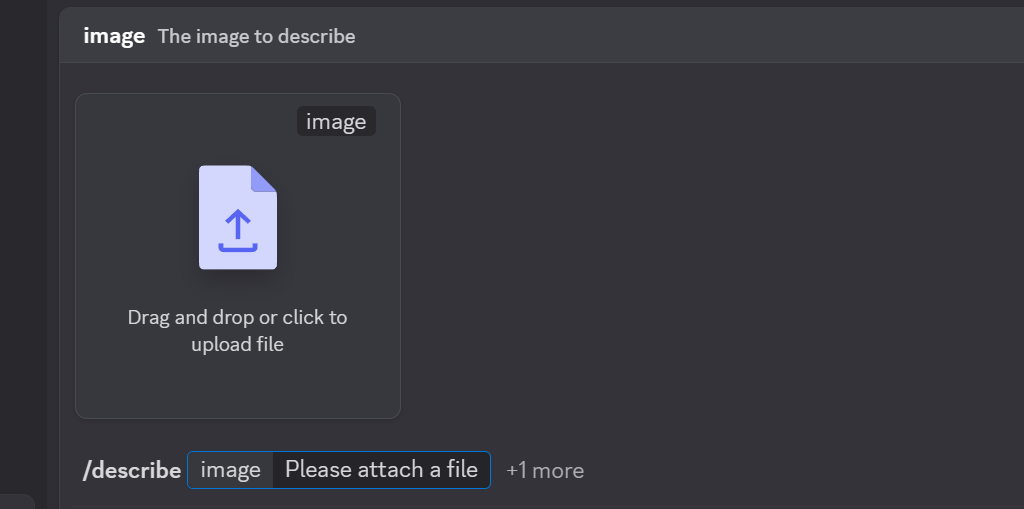
Describe feature ( /describe)
I downloaded a specific art image from Unsplash, then typed /describe in the prompt field and pressed Enter.A image upload option will pop-up, then I selected the downloaded image, uploaded it, and hit Enter to submit it for analysis.
And below are the result.
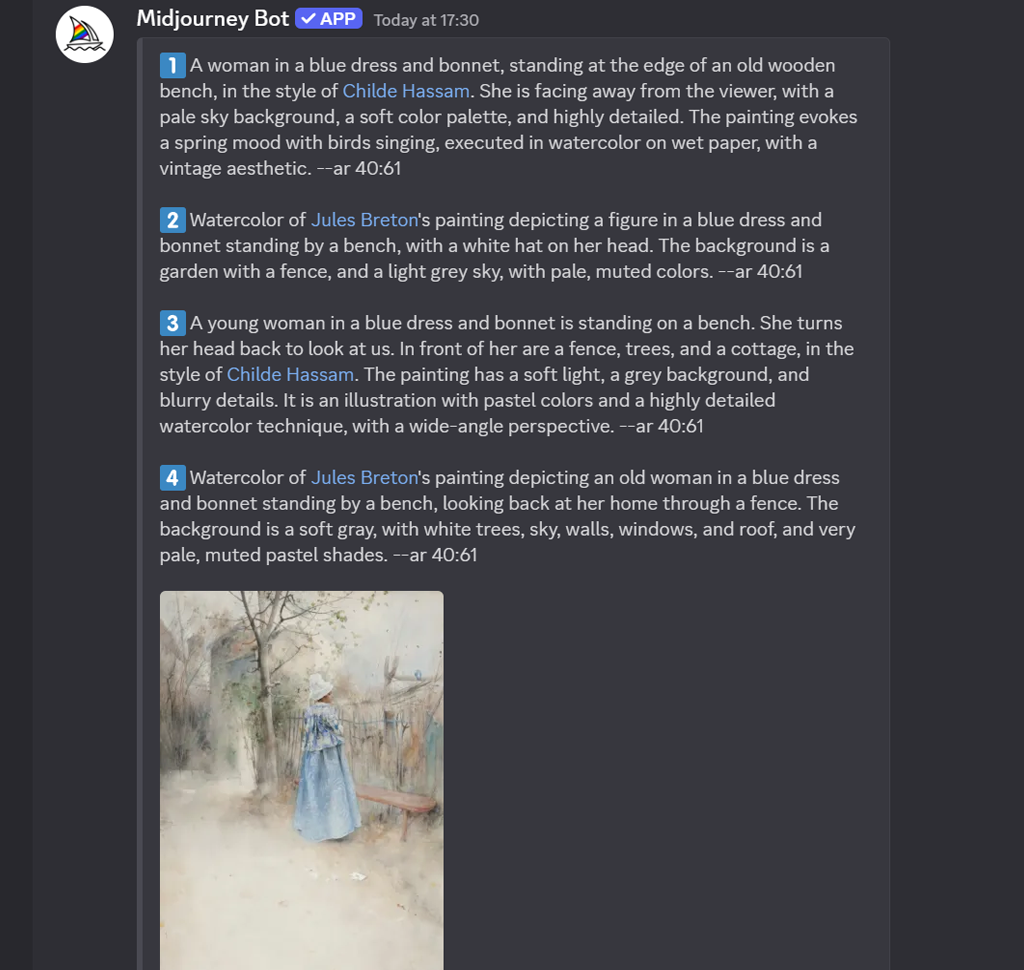
From the /describe results, I selected styles that matched what I was looking for — such as watercolor on wet paper, soft, loose-style watercolor painting, pastel colors, and highly detailed watercolor techniques, gentle brushstrokes, soft pastel hues, and textured watercolor paper with visible brushwork, etc.
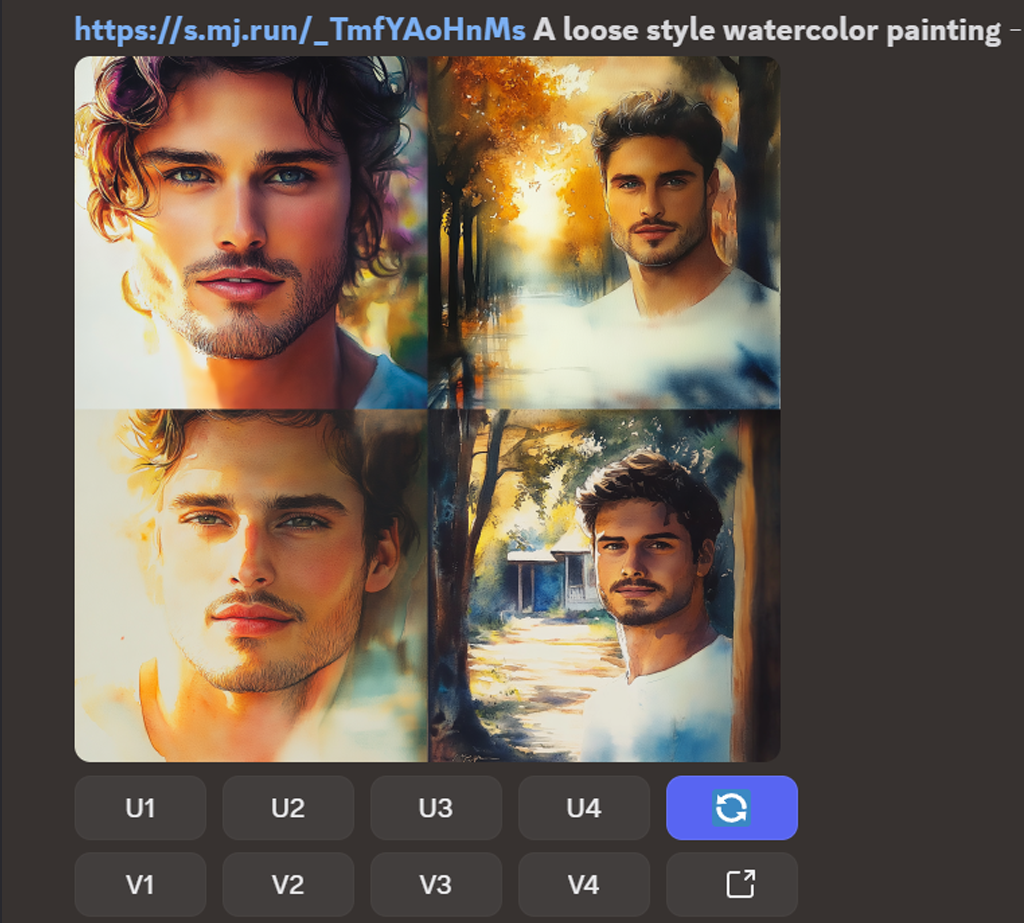
/imagine Image link, Prompt – to generate watercolor art
Next, I am using the previously saved generated image link to convert it into a watercolor effect. So, first, After feeding /imagine command I pasted the image link in the prompt field, followed by a comma, and then added my prompt. Prompt: “A loose-style watercolor painting.”
Command formate: /imagine [image link] [prompt]
Below are the four watercolor-style artworks it generated.
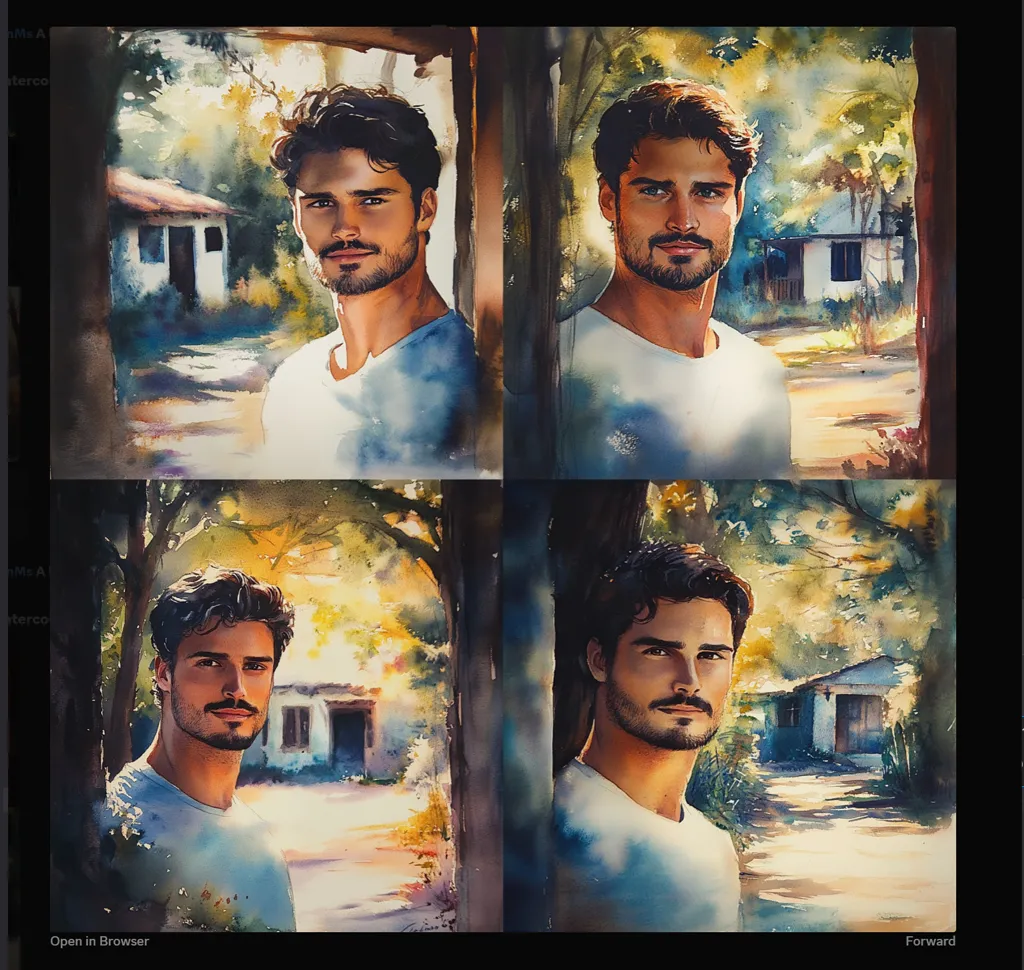
I checked the variation of the fourth image V4 and got the following images.
Refined prompt
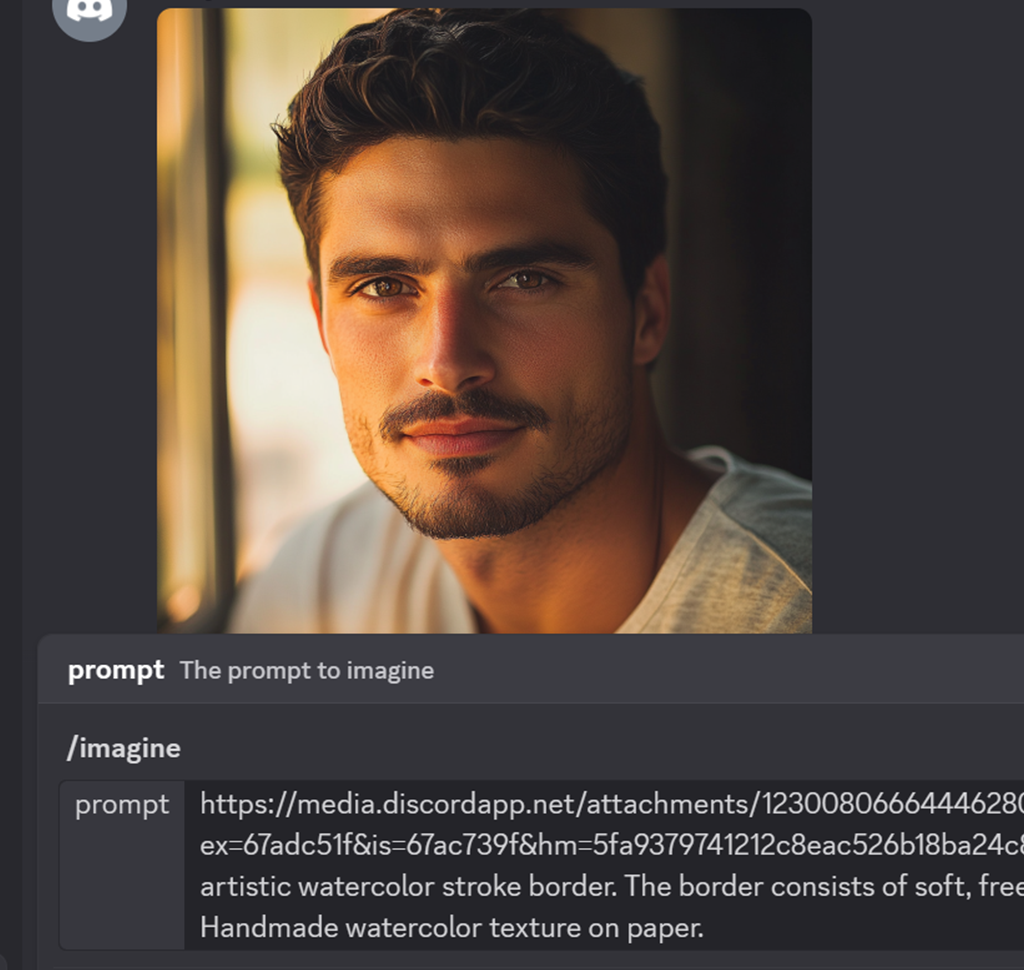
Since I wanted to create a consistent watercolor portrait of the same profile image at different ages, I first used the image link, and then applied a refined watercolor prompt.
Command formate: /imagine [image link] [prompt]
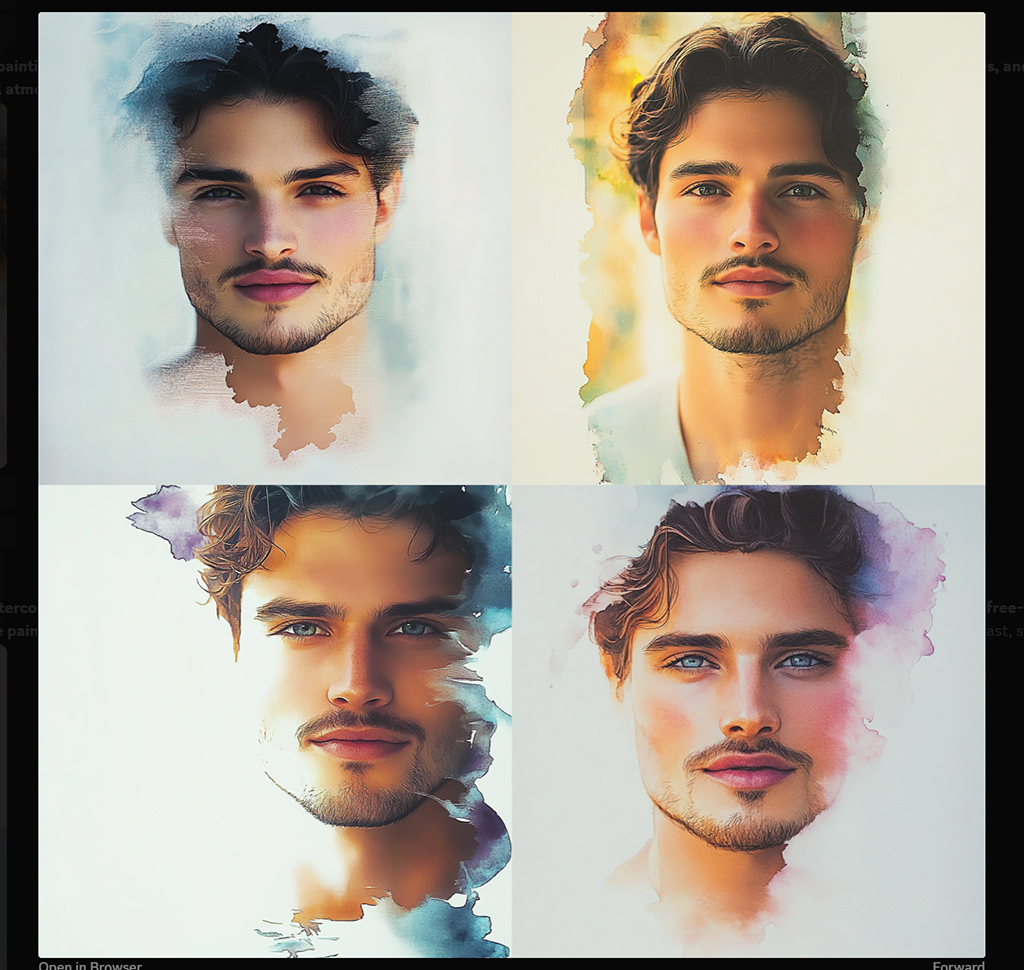
Refined Prompt: A loose style watercolor portrait centered in the middle of the canvas, surrounded by an artistic watercolor stroke border. The border consists of soft, free-flowing watercolor splashes, irregular brushstrokes, and organic paint drips fading into the white background. The painting is airy and expressive, using gentle pastel tones and light washes. Handmade watercolor texture on paper.
And below are the image results. I selected 4th image for consitancy watercolor portrait.
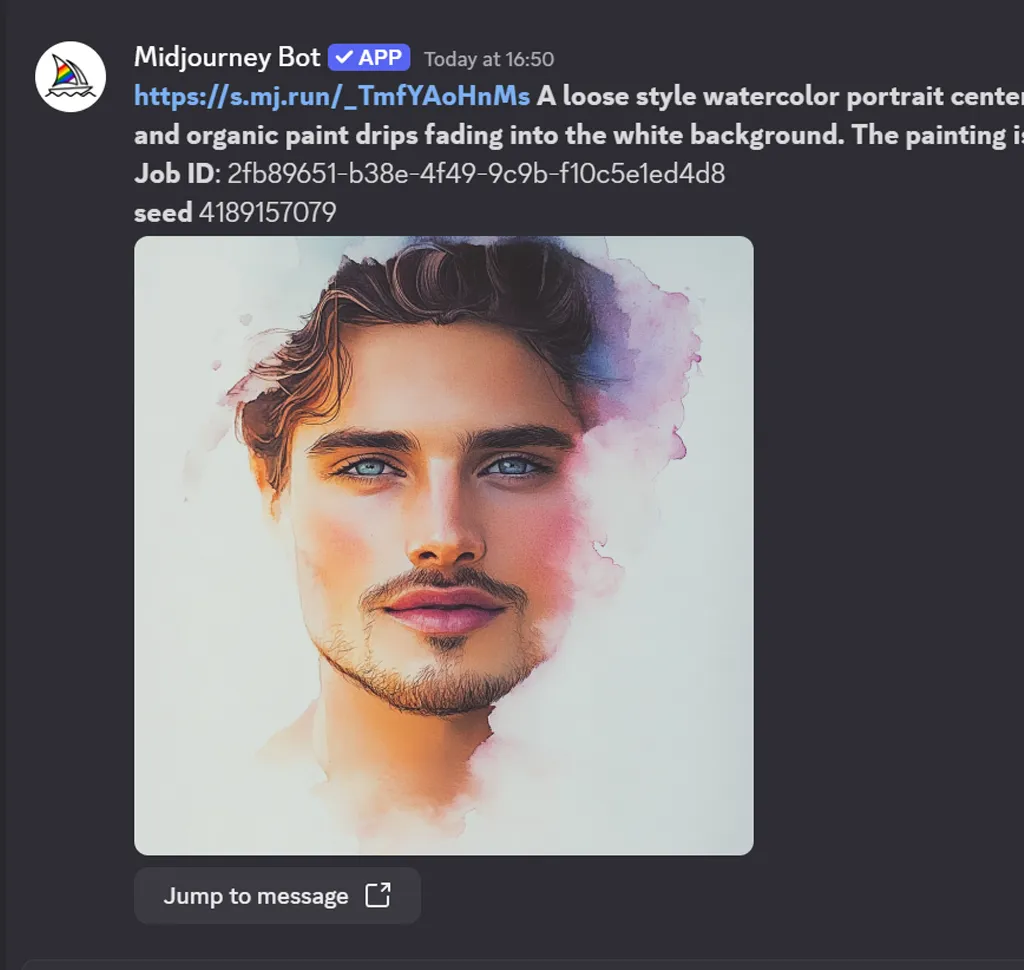
Job Id and Seed feature
Before we create a consistent watercolor portrait, it’s helpful to first understand the Job ID and Seed feature in MidJourney, as these can significantly assist in generating your image more accurately.
- Seed ( –seed) it allows you to recreate or tweak the same image consistently by using the same randomization starting point.
- Job ID helps identify and reference a specific image generation task.
To view these seed of generated image, simply click on the message icon located in the top-right corner of the generated images. Shown below.
After clicking on the message icon, a message notification will pop up. You can click on it to view the image’s Job ID and Seed. Alternatively, you can click on the MidJourney Bot to access this information. It will be displayed as shown below.
Let’s generating watercolor aging portraits
To generate watercolor ageing effect, I used command
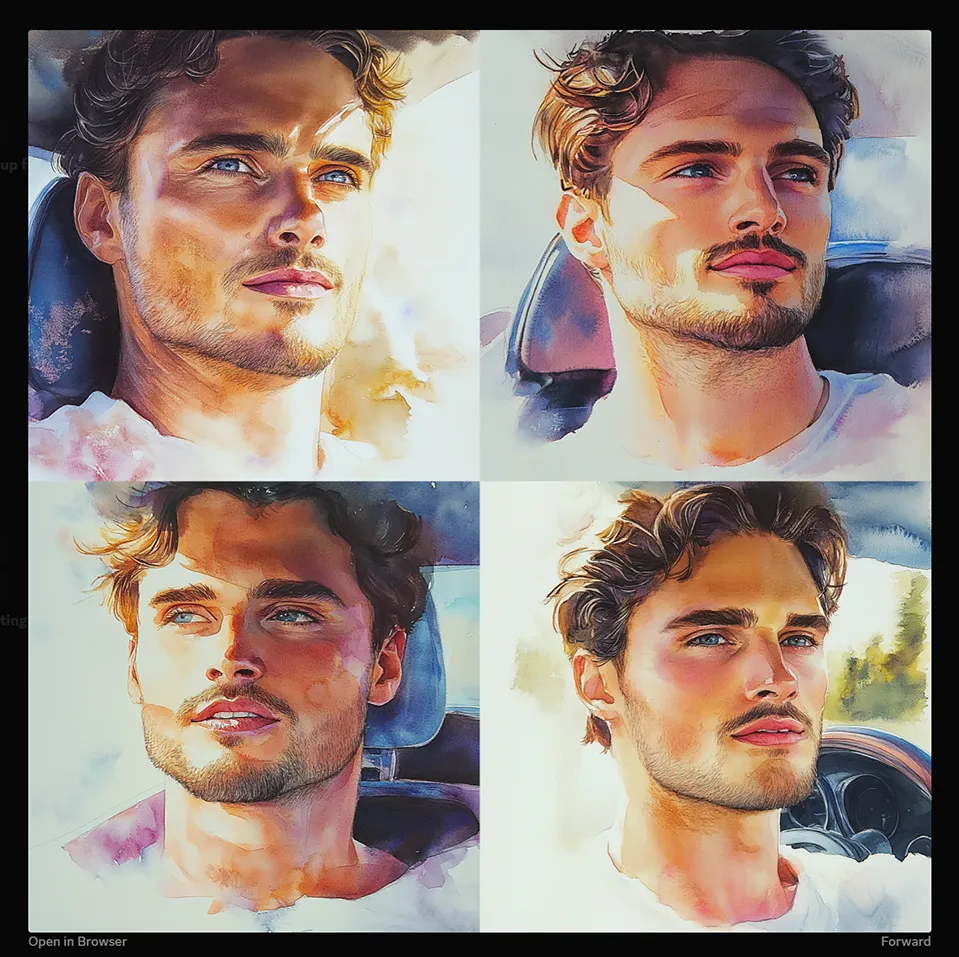
Command format: /imagine [image link] [prompt] [seed]
Prompt: Watercolor painting of a man driving the car, close-up face view. And below are the results. (Throughout the process of generating the watercolor effect below, I used the same seed.)
Next, I tried another prompt: ‘Watercolor painting of a man talking with a girl in the park’ using the same seed.
Command format: /imagine [image link] [prompt] [seed]
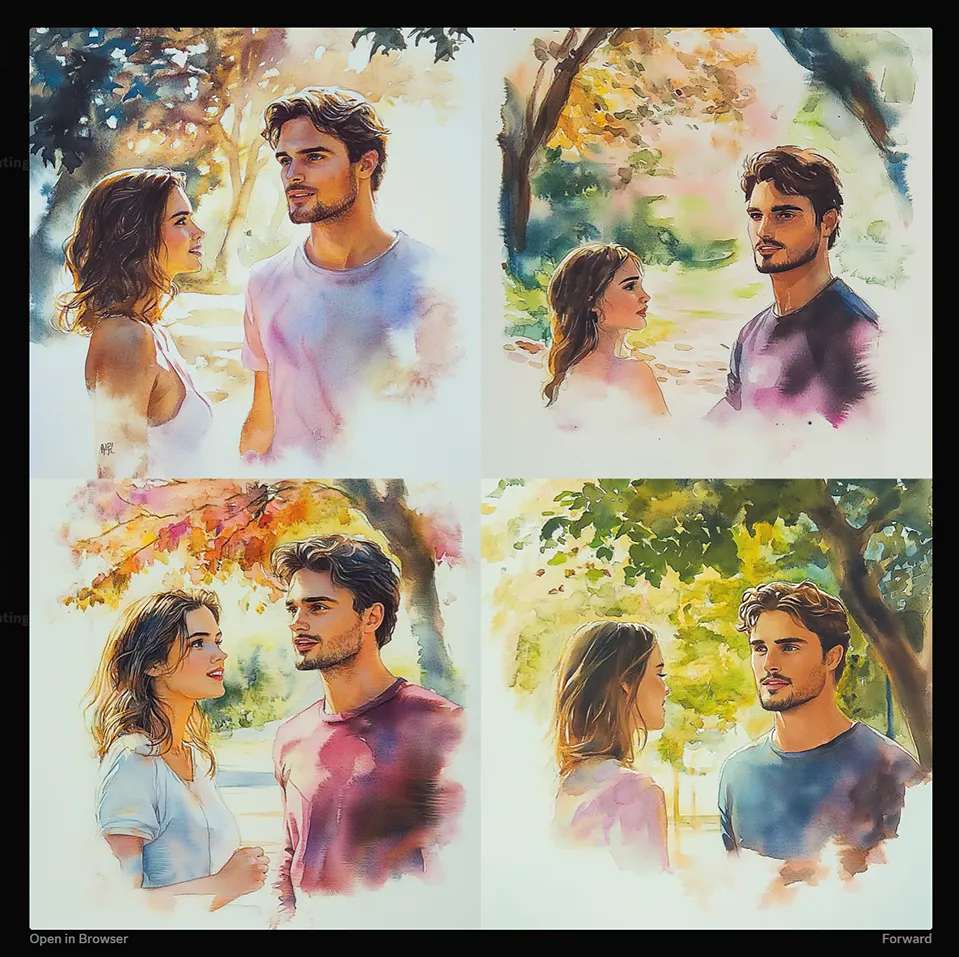
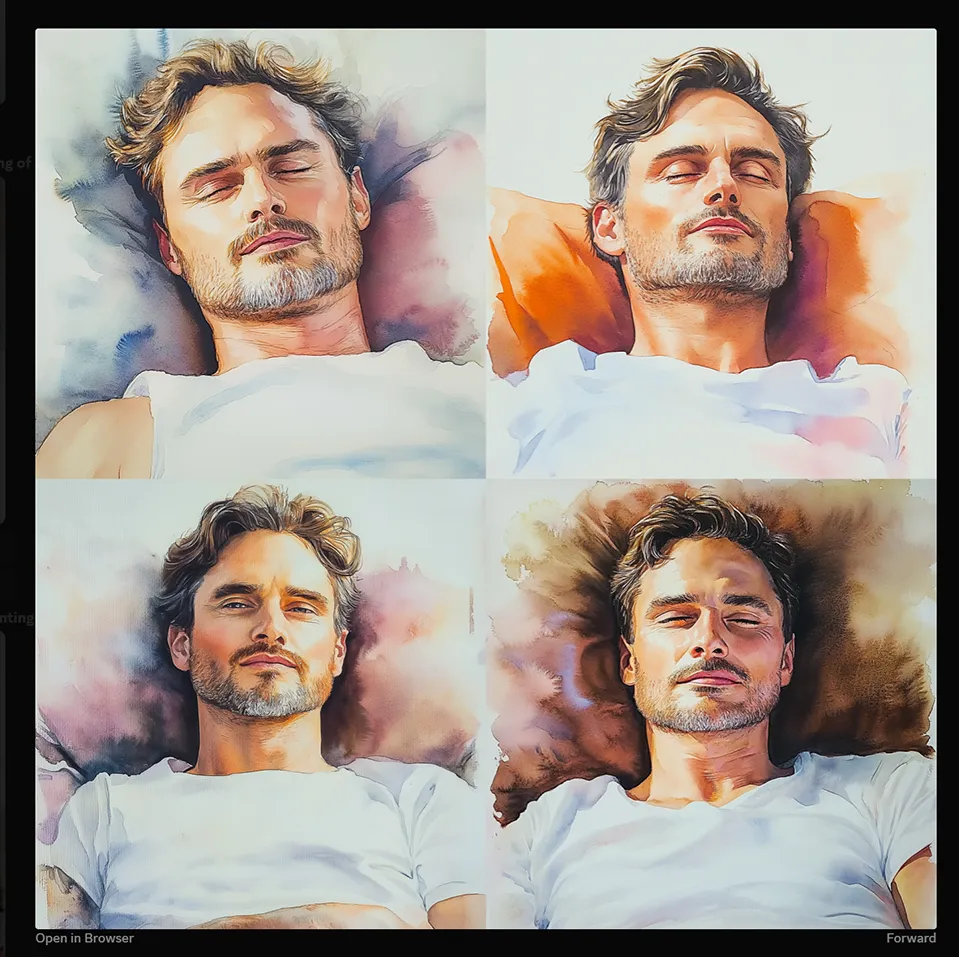
Aging watercolor effect
Command format: /imagine [image link] [prompt] [seed]
Watercolor painting of 75 year old man relaxing – Prompt
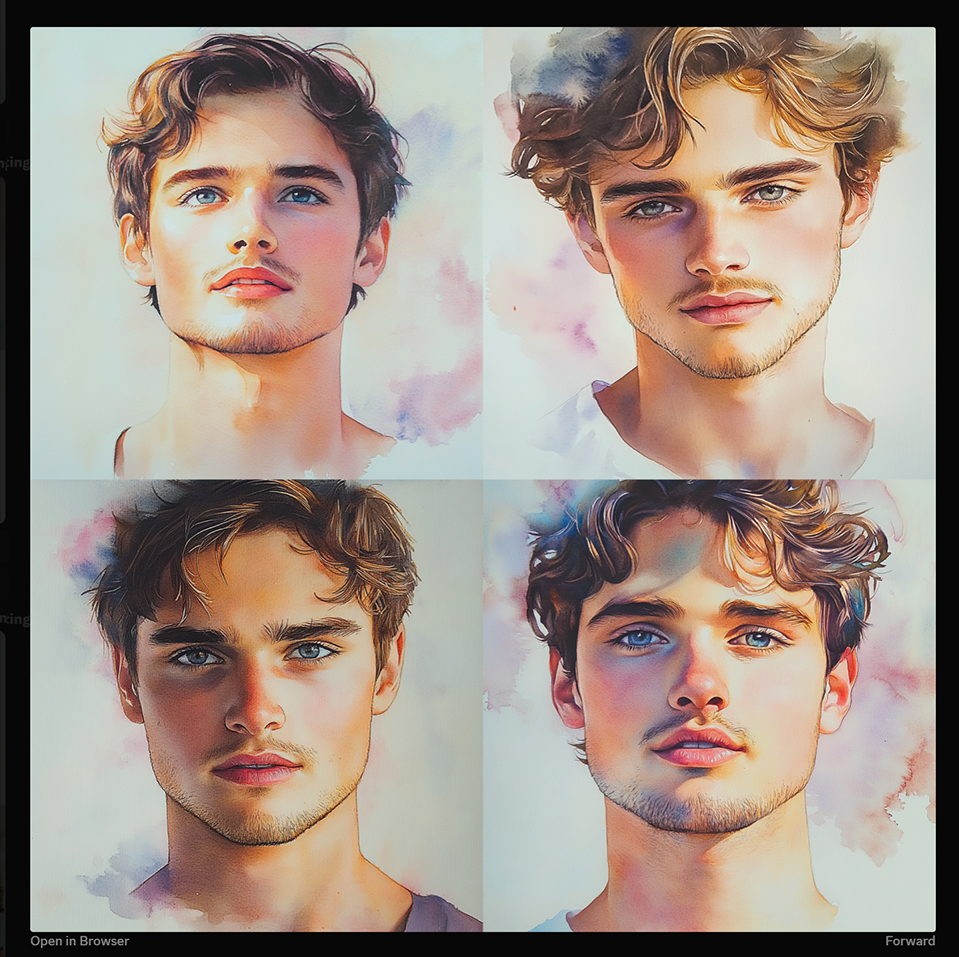
Prompt: Watercolor painting of a 15 year old boy
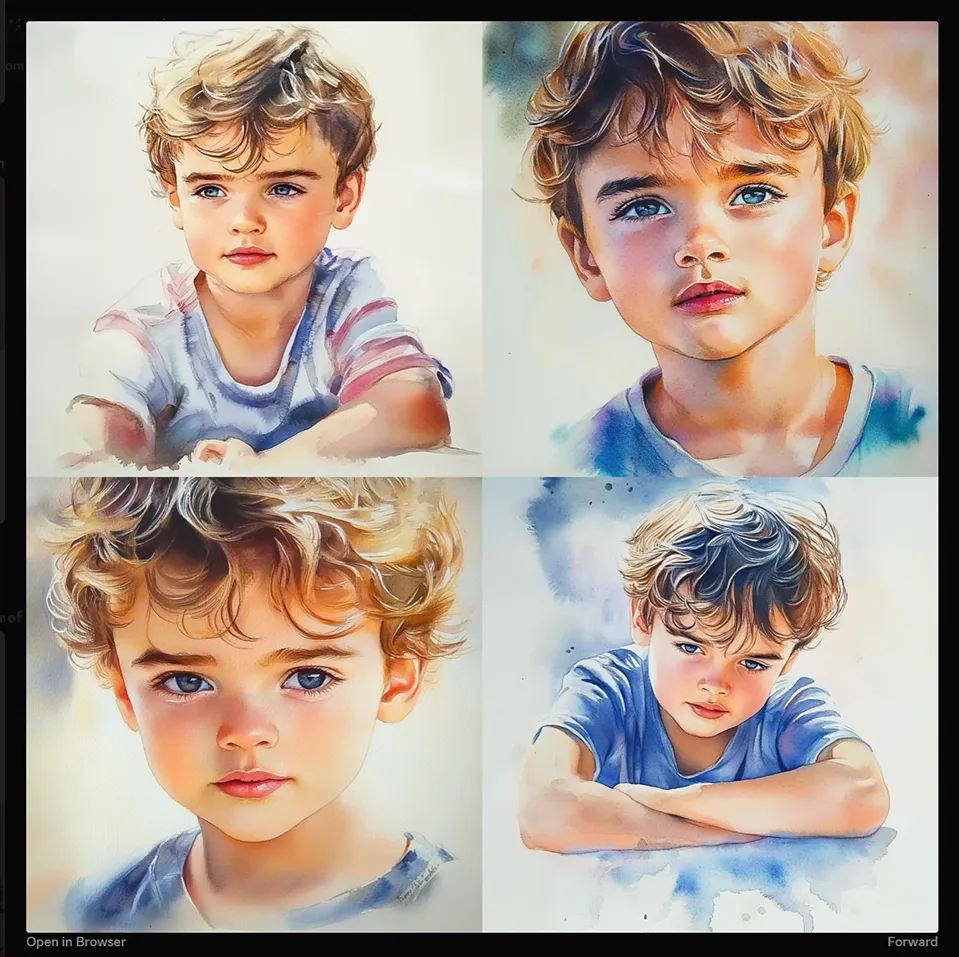
Watercolor painting of a 5 year old baby boy
Angles and expressions
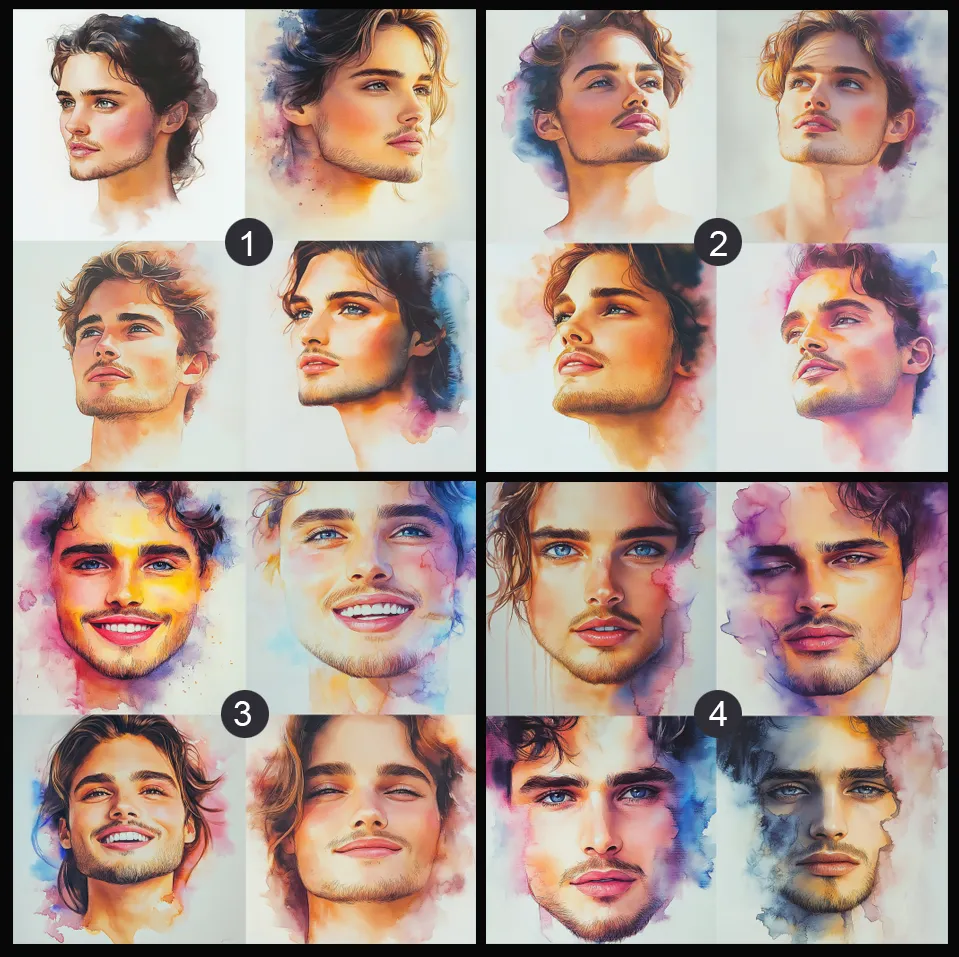
I just tried with different variation like portrait’s angle and expression with simple prompt prefixing the image link and seed.
Command formate: /imagine [image link] [prompt] [seed]
1. Prompt: Create a watercolor painting of a side-view profile portrait.
2. Prompt: low-angle view prompt.
3. Prompt: happy, smiley.
4. Prompt: serious, sad.
Note: I generated all images featured in this post using MidJourney paid subscription.
In this post watercolor art was created using AI tools as part of an exploration into new and trending digital art techniques. While I find these technologies fascinating, I have deep respect for traditional artists and the skill, time, and emotion they pour into their work. This post is not a comparison—it’s a celebration of creativity in all its forms.
Stay Informed With the Latest & Most Important News
Previous Post
Next Post
Previous Post
Next Post


Hi, I’m Krishna Kumar (CrishCreative), a seasoned graphic designer with a professional background in branding and advertising. My passion lies in blending art and science to craft innovative ideas and strategies that leave a lasting impact. I am currently working as a creative director.Beyond work, I immerse myself in art, crafting, photography, and hands-on projects—whether it’s tinkering with electronics, exploring mechanical builds, or diving into creative crafts. Driven by curiosity, I’m always learning, discovering, and finding inspiration in the unexpected. For me, every challenge is an opportunity to grow, spark fresh ideas, and create something meaningful.


Summer Kennedy
I just like the helpful information you provide in your articles
Ricky Sanford
Good post! We will be linking to this particularly great post on our site. Keep up the great writing